
Most homeowners throw up a couple floodlights and pray for the best. That’s not security—that’s wishful thinking with a higher electric bill.
Real deterrence means lighting every entry point burglars actually use: front and back doors, side gates, garage entries, and those shadowy corners where intruders love to hide. You need strategic placement at 8-10 feet high, motion-activated where it counts, and zero dark gaps between fixtures.
After years in security consulting, I’ve seen what stops break-ins and what just looks pretty. The difference? Understanding how criminals think and using light as a weapon against them. Let me show you exactly where those lights need to go—and why most people get it dangerously wrong.
Why Outdoor Security Lighting Placement Matters for Deterrence
Before we dive into specific locations, you need to understand what’s going through a burglar’s mind when they’re sizing up your property.
Most break-ins aren’t Ocean’s Eleven-style heists. They’re opportunistic crimes by people looking for the easiest target with the lowest risk.
Studies show that the average burglar spends less than 60 seconds evaluating whether your home is worth the risk. That’s it. One minute to decide if they’re coming back later or moving on to the next house.
What makes them move on?
Visibility. The fear of being seen, identified, and caught trumps almost everything else. This is where proper lighting becomes your secret weapon.
But here’s what most homeowners miss: decorative pathway lights and that cute lantern by your mailbox aren’t security lighting. Real security lighting eliminates shadows, removes hiding spots, and makes an intruder feel exposed.
It’s the difference between stage lighting and interrogation room lighting—one creates ambiance, the other leaves nowhere to hide.
Where to Install Outdoor Security Lighting For Deterrence
1. Front Entry Points and Main Door
Your front entrance is always priority number one, and not just because it’s obvious. Yeah, most burglars prefer back or side entries, but your front door makes a statement to everyone who passes by. A well-lit entrance tells potential intruders that you’re paying attention to security.
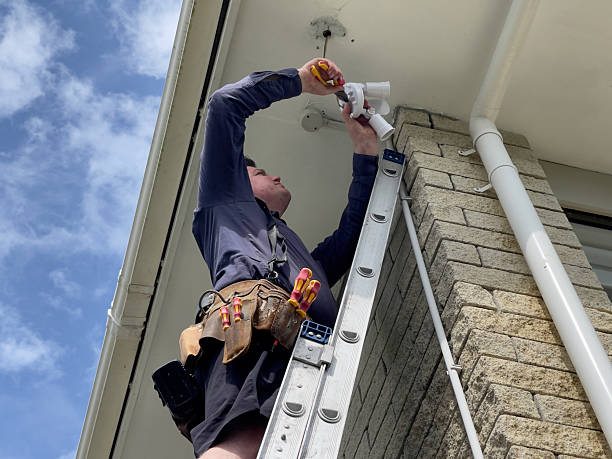
Mount your lights 8-10 feet high, angled downward to illuminate the entire door area and at least 6-8 feet out from the threshold. I’m a big fan of motion-activated lights here rather than dusk-to-dawn fixtures.
Why? Because when that light kicks on, it catches attention—both yours and your neighbors’. That sudden illumination is a psychological deterrent that constant lighting just can’t match.
Don’t make the rookie mistake of installing just one light directly above the door. You want coverage from at least two angles to eliminate those facial shadows that make identification from security cameras nearly impossible.
Think about how Hollywood villains are always shot from below with dramatic shadows—you want the exact opposite effect.
Lighting up your front entry is step one in the security playbook—but let’s be honest, a well-lit door is still just a door with a lock that can be picked, bumped, or bypassed.
If you’re serious about turning your main entrance into an impenetrable checkpoint, it’s time to talk about what happens when old-school keys meet cutting-edge tech. Biometric locks don’t just secure your door—they make it personally yours, accessible only to those whose fingerprints (literally) pass the test.
2. Side Gates and Pathways
This is where properties get vulnerable fast.
Side yards are basically burglar highways—narrow passages that neighbors can’t see, often leading directly to your backyard.
I’ve watched security footage where intruders casually walked alongside yards because they were completely dark, spent two minutes at a back window, and left the same way.
Light your side access points like they’re as important as your front door, because honestly, they might be more important.
Space your lights no more than 15-20 feet apart along any pathway longer than that. You’re trying to eliminate every single dark pocket where someone could pause, assess, or work without being visible.
If you’ve got a side gate, install lights on both sides of it. Before the gate (to deter approach) and after the gate (to eliminate the dark zone someone enters after they’ve gotten past your first barrier). Gates give people a false sense of security, but a $30 gate lock isn’t stopping anyone serious—proper lighting might.
But here’s the thing about outdoor security lighting—it’s only half the conversation. Sure, those motion-activated floods will make prowlers think twice, but you know what amplifies that “stay away” message tenfold? A well-placed security sign and stickers catching the glow of that same light. It’s like lighting announces “we’re watching,” while signage declares “and we mean business.” Think of them as the one-two punch of home security psychology
3. Backyard and Rear Entry Points
Your backyard is probably the most vulnerable part of your entire property. Privacy fences that keep neighbors from seeing your weekend BBQ also keep them from seeing someone prying open your patio door at 2 AM.
Every rear entry point—back doors, patio sliders, basement windows, any door leading from your garage into your house—needs dedicated lighting. Not ambient backyard lighting that makes your deck look nice. I’m talking about focused security lighting that illuminates these access points and the 10-15 feet of approach area around them.
Here’s the balance you’re trying to strike: you want enough light to expose intruders without lighting up your bedroom like a stadium every night. Smart controls help here. You can set lower-level lighting for normal evenings and have motion sensors trigger brighter floods if someone’s moving around back there at 3 AM.
And for the love of all that’s secure, don’t light up your backyard while leaving your back door in shadow. I’ve seen this more times than I can count. People install a nice deck light or patio umbrella lights, then wonder why their security camera footage shows nothing useful when someone’s actually at their door.
4. Garage and Driveway Areas
Your garage is basically a goldmine for thieves—tools, bikes, sometimes a car, definitely packages if they’ve been watching your delivery patterns.
Whether you’ve got an attached or detached garage, it needs serious lighting attention too.
For attached garages, cover both the main vehicle door and any service doors. That side door everyone uses to grab tools or take out trash? It’s often the least secure door on your property, and it goes straight into your garage and then potentially your house.
Detached garages are even trickier because you’ve got to light the path between your house and the garage, plus all the garage entry points. This is another spot where motion-activated lighting really shines (pun intended).
It saves energy, and that sudden light flood when someone approaches is wonderfully unsettling for anyone who shouldn’t be there.
Your driveway needs consideration too, especially if you park vehicles outside. Lights should cover the entire length, eliminating blind spots where someone could crouch between cars or work on doors/windows out of sight.
5. Dark Corners and Hiding Spots
Walk around your property at night. Seriously, do this before you install anything else. Look for anywhere someone could stand, crouch, or hide while observing your house or waiting for you to go to sleep.
Common culprits: that space beside your AC unit, behind large shrubs or trees, recessed areas created by architectural features, the gap between your fence and a shed.
These are what security professionals call “staging areas”—places where intruders can get comfortable, watch patterns, and plan their approach without being visible.
Each one needs to be lit. You don’t need floodlights everywhere, but you need enough illumination that these spots no longer offer concealment. Sometimes a strategically placed uplight or wide-angle fixture can eliminate three or four potential hiding spots with a single installation.
Security Lighting Installation Mistakes That Reduce Deterrence
Let me save you from the mistakes I see constantly.
First up: mounting lights too low. When you install security lights at 6 feet or below, you’re basically handing an intruder a tool. They can reach them, disable them, unscrew bulbs, or cover sensors with spray paint or tape. Get your lights up to 8-10 feet minimum. Make them work for it.
Second mistake? Creating glare instead of illumination. I’ve reviewed countless security camera recordings that showed nothing but white blobs because the lights were pointed at the camera instead of the area the camera was watching. Position your lights to illuminate faces and bodies, not to blind your own surveillance system.
Then there’s the GAP problem. People light their front door, maybe the back, and think they’re covered. Meanwhile, there’s a 20-foot stretch of complete darkness between those zones where someone can work undisturbed.
Your lighting should overlap slightly. If you can find a dark spot to stand on your property at night, you’ve found a problem.
Wrong brightness is another issue—either too dim to matter or so bright it annoys everyone (including you) and ends up getting turned off. You’re looking for 700-1300 lumens for most security applications, with color temperature around 5000K (bright white) for the clearest visibility and camera footage.
Finally, installing lights and forgetting about them. Bulbs burn out, sensors get covered in spider webs or wasp nests, fixtures get knocked off alignment by storms. Set a calendar reminder to test your security lights every few months. A light that doesn’t work is worse than no light at all—it gives you false confidence.
Pro Tips for Maximum Deterrence Effect
Security lighting works best when it’s part of a layered approach. Pair your lights with visible cameras, even if they’re not monitoring every square inch. That combination—well-lit areas plus cameras—is incredibly powerful psychologically.
Smart controls are worth the investment. Being able to adjust schedules, trigger lights remotely, or have them automatically respond to your security system creates an active defense rather than passive lighting. Plus, modern smart bulbs and fixtures give you way more control over brightness and timing than the basic dusk-to-dawn sensors.
Here’s something people don’t think about: test your coverage by having someone walk around your property at night while you watch (or review camera footage). You’ll spot coverage gaps, weird shadows, and blind spots you’d never notice just by looking at your lights during installation.
And maintain a schedule. Check your lights quarterly. Clean fixtures, replace bulbs proactively rather than waiting for them to burn out, trim any vegetation that’s grown to block light patterns. Security lighting only works if it’s actually working.
Conclusion
Like I keep saying: “strategic outdoor lighting isn’t about turning your home into Fort Knox. It’s about making a clear statement: this property is protected, monitored, and not worth the risk.”
The best time to evaluate your security lighting was before you needed it. The second best time is tonight. Grab a flashlight, walk your property, and identify every dark spot, every hidden corner, every approach that offers concealment. Those are your priorities.
Start with the critical zones—entries and pathways—then work outward to eliminate hiding spots and gaps. You don’t need to do everything at once, but having a plan ensures you’re building a comprehensive security lighting system rather than just adding random fixtures.
Your home should be your sanctuary, not a target. Proper lighting placement is one of the most cost-effective security investments you can make. Now you know where to put those lights—time to make it happen.